Miniature painting is a captivating hobby that allows me to unleash my creativity and bring my favorite characters to life.
I started my miniature painting journey years ago and am always learning new things.
Whether you’re a seasoned pro or just starting, there’s always something new to learn.
This ultimate guide will equip you with the knowledge and skills to elevate your miniature painting game. Get ready to embark on an exciting journey of artistic exploration! Inside, I’ll cover the following:
- Suggest what tools I think you need at every level.
- How I clean and prepare my miniatures for painting.
- A basic understanding of color theory to help with color selection.
- Basic and advanced painting techniques.
- And more.
Let’s start with the tools you should need at every level of your miniature paint exploration.
Essential Tools and Materials
for Miniature Painting
When I first started, I was overwhelmed by all the fancy gadgets and gizmos out there. Have you seen some of those pro setups?
It’s like walking into a mini art supply store! But here’s the thing – you only need some of that stuff. Trust me, I learned the hard way after blowing too much cash on things I barely used.
So, let’s talk about the beginner’s arsenal first. If you’re just dipping your toes into miniature painting, here’s what you need to get started:
Beginner’s Arsenal: Getting Started with the Basics
Brushes
First things first: brushes. You don’t need a million of them to start.
I learned the hard way after buying a huge set I barely used. Half of my art school collection could have been more helpful when I got into the hobby.
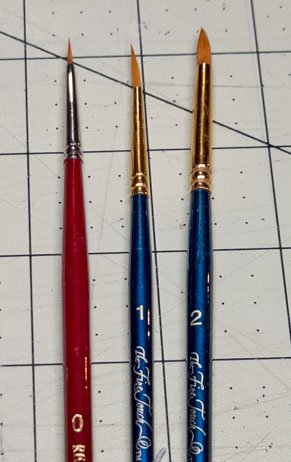
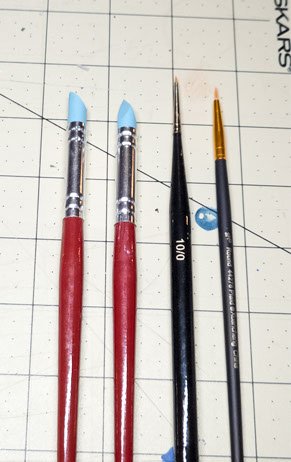
To begin with, stick with sizes 0, 1, and 2. These’ll cover most of your bases, from base coats to details. I still use my trusty size 1 for almost everything!
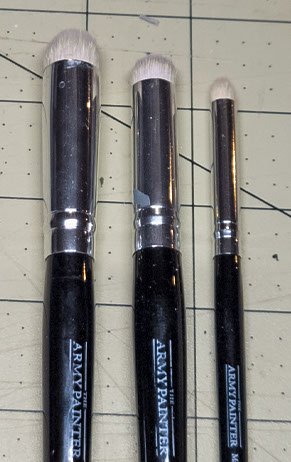
Also, quickly get a large flat brush to paint vehicles and larger models. Unlike using smaller brushes, it will save time and your sanity.
Paints
Now, onto paints. When I started, I thought I needed every color under the sun.
Spoiler alert: I didn’t.
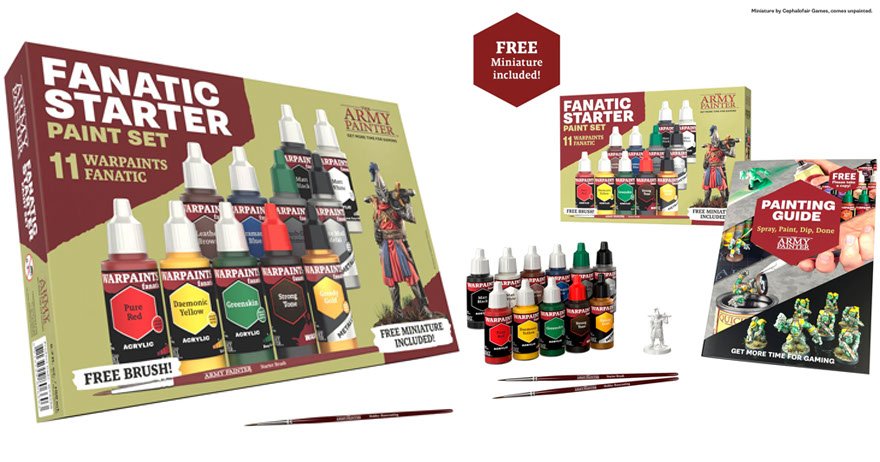
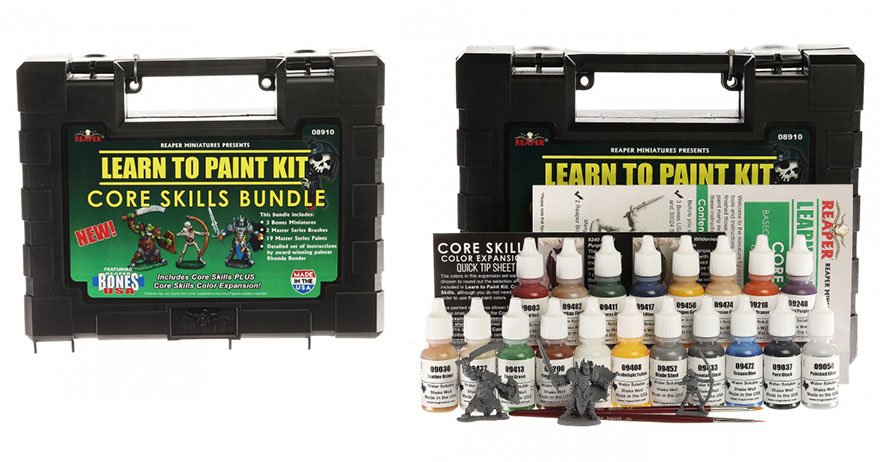
An essential acrylic set with primary colors will do you just fine. You can mix these to get any color you need. Plus, it’s a great way to learn about color theory. Trust me, your wallet will thank you later.
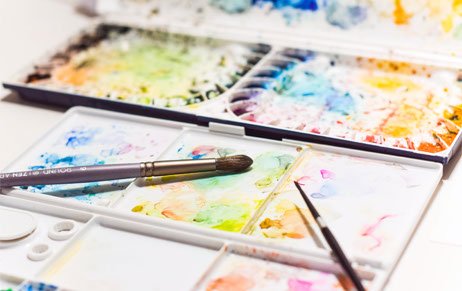
Palettes
Oh, and remember a palette!
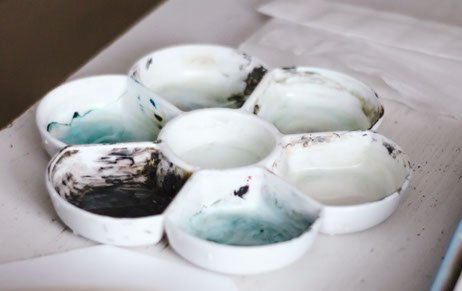
A simple plastic one is perfect for beginners.
Fortunately, I had a few when I started—they worked great for me.
A proper palette makes mixing colors so much easier.
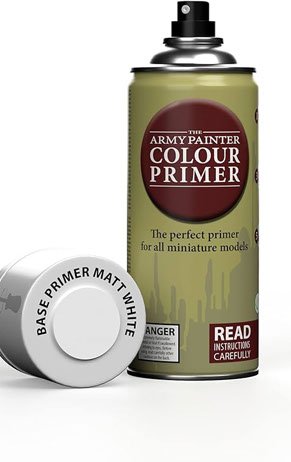
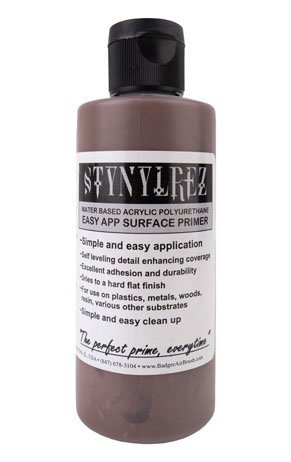
Primers
Primer is super important, folks.
I learned the hard way that not all primers are created equal. The cheap primers I bought worked for some models, but the primer dried tacky for others and would create a texture when I started laying down paint.
A good spray primer (black, white, or gray), like Krylon or Rustoleum, will make your paint stick better and your colors pop.
Don’t go overboard with the priming as I did once – I ended up with a mini that looked more like a snowman than an orc!
Lighting
Lighting is crucial. I used to paint in a dimly lit corner and wondered why my minis looked different in daylight.
Invest in a decent desk lamp. Your eyes (and your minis) will thank you.
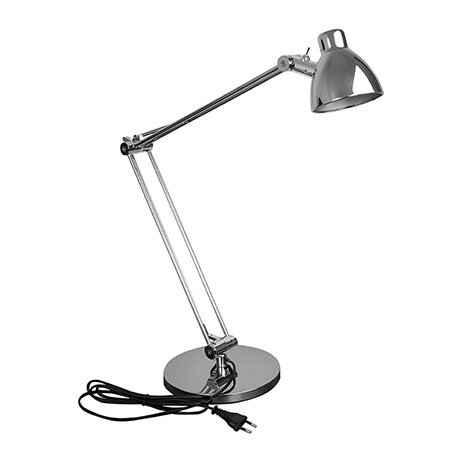
Also, get a daylight bulb for the best color accuracy.
Other tools
Now, let’s talk about some tools you might not think of right away:
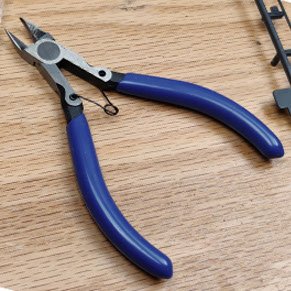
- A pair of hobby clippers to free the model bits from 3D print supports or sprues.
You want one with a flat edge on the back and one that is long and thin to reach the sprue frame’s hard-to-reach spots.
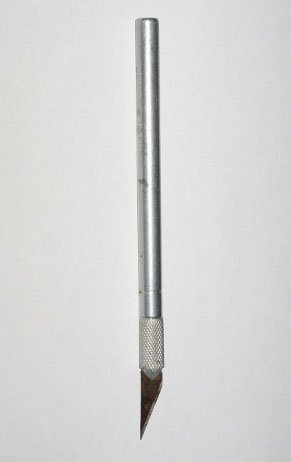
- A hobby knife is essential for cleaning up mold lines. I once painted a mini without doing this first, and those lines stood out like sore thumbs once it was painted.
- Get a cutting mat to protect your workspace. Learn from my mistakes – tabletops and knife marks don’t mix well!

- Sanding sticks and sandpaper are great for smoothing over surfaces. They’re convenient for fixing mistakes. And trust me, you’ll make mistakes. We all do!
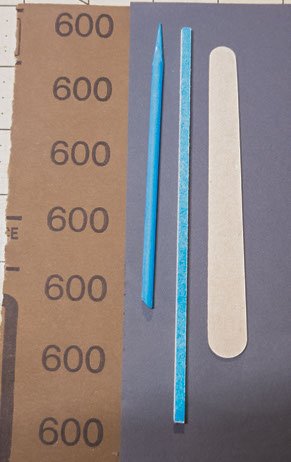
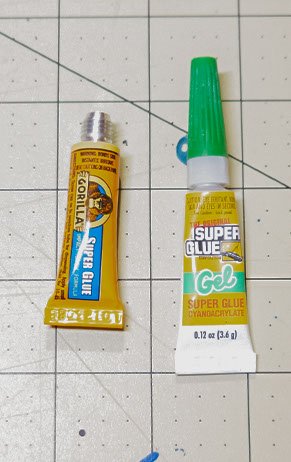
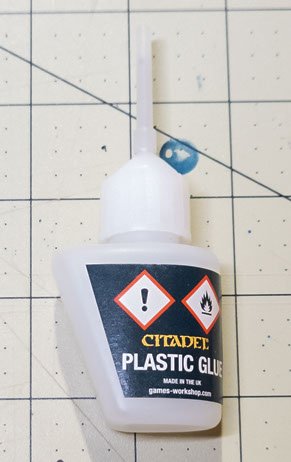
- Remember glue! You’ll need it to assemble your models. I prefer plastic glue for plastic minis and super glue for metal ones.
Just be careful with that super glue—I once glued my fingers together. Not fun!
One thing I wish someone had told me when I started is that you don’t need to buy everything at once. Start with the basics and add to your kit as you go.
It’s easy to get carried away (I know I did), but remember, it’s not the tools that make the painter—it’s practice and patience.
Speaking of practice, don’t get discouraged if your first attempts don’t look like you envisioned.
My first mini looked like it had been dipped in paint and rolled in glitter (don’t ask). But with each mini, you’ll get better. I promise!
Remember, the most important thing is to have fun.
This hobby is all about creativity and relaxation.
So, don’t stress too much about having the perfect setup immediately. Just grab your brushes, squeeze out some paint, and dive in. Before you know it, you’ll be creating tiny masterpieces!
Oh, and one last tip: thin your paints! It’s better to do multiple thin coats than one thick, globby one. I learned that the hard way after my first mini ended up looking like it was wearing a thick coat of armor… made of paint.
Once you’ve painted a few minis and are ready to step up your game, it’s time to expand that toolbox. This is where the intermediate kit comes into play:
Intermediate Kit: Expanding Your Toolbox
Dry brushes and sculpting tools
Let’s start with brushes.
Once you’ve mastered the basics, it’s time to branch out. At this stage of your painting journey, you’ll want to consider more specialized brushes, such as detail, liners, and dry brushes.
I’ll never forget the day I got my first fine detail brush. Suddenly, those tiny eyes I’d been struggling with became easier to paint!
And don’t even get me started on dry brushing. The first time I tried it, I thought I’d ruined my mini. I was just being too heavy-handed.
Lesson learned: less is more with dry brushing!
Wet palette
Now, let’s talk about the wet palette.
This thing is a game-changer, folks.
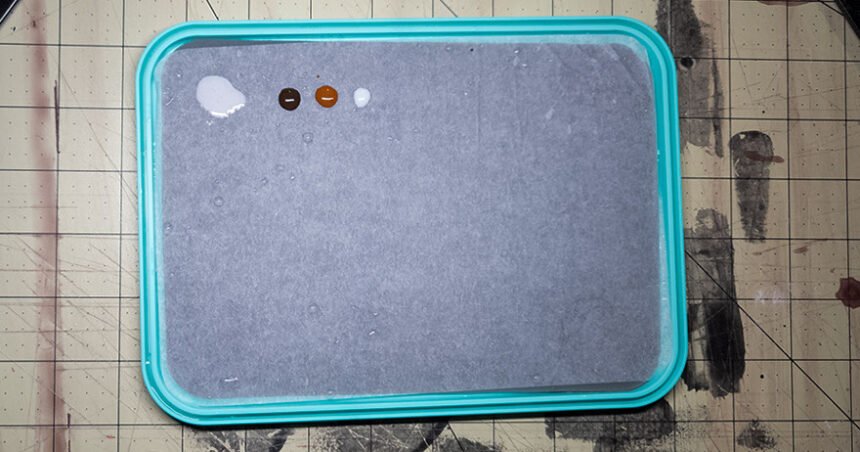
I used to waste so much paint because it would dry out on my regular palette. The first time I used a wet palette, it was like magic. My paints stayed workable for hours! Plus, it makes blending colors so much easier. Trust me, your wallet (and your minis) will thank you.
Metallic and speed paints
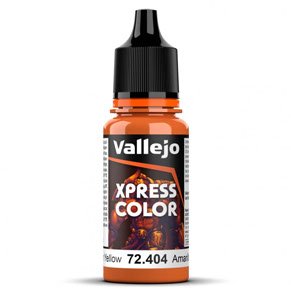
Speaking of paints, this is where you can start to have fun. Expanding your range of colors opens up so many possibilities.
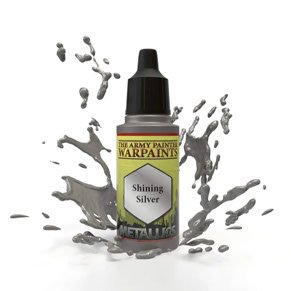
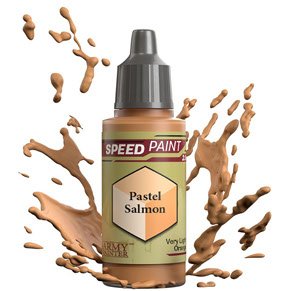
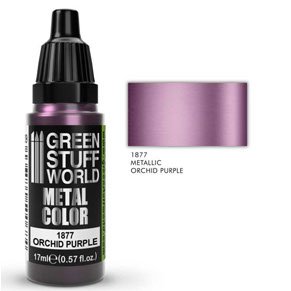
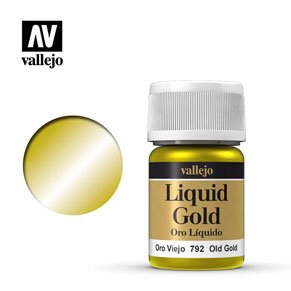
Here’s the level where you should be trying speed paints and metallics.
I remember the first time I used metallic paints – suddenly, my space marines didn’t look like they were wearing colored tin foil anymore!
Just be careful not to go overboard. I once painted an entire dragon in metallic colors. It looked more like a disco ball than the fearsome beast they’re known to be.
Magnifiers
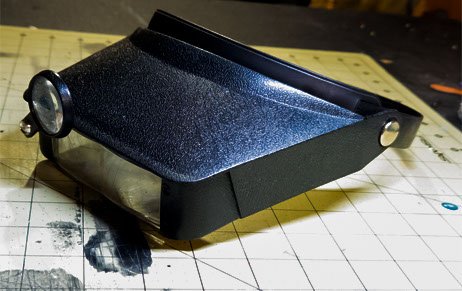
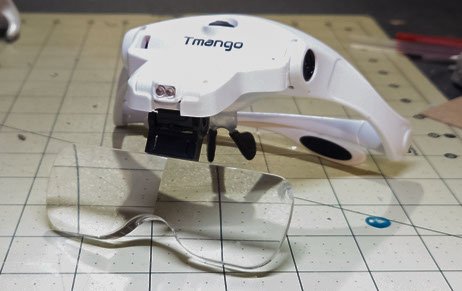
I wish I’d invested in magnification sooner. My eyes aren’t what they used to be, and trying to paint tiny details without magnification gave me headaches.
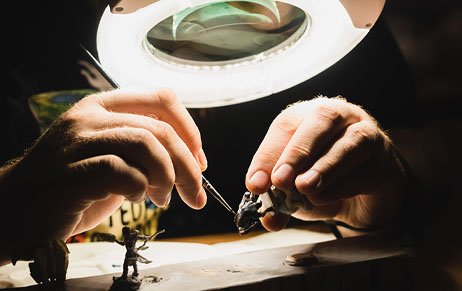
A head magnifier or magnifying lamp is a must. Trust me, your eyes will thank you.
I resisted getting one for years, thinking my eyesight was fine.
Then I got one and realized I’d missed so much detail. It was like entering a whole new tiny world!
Just be prepared for the shock when you first see your paint job magnified—I thought I was doing great until I saw all those brush strokes up close!
Airbrush

Now, let’s talk about airbrushing. This is a big step, and I’ll be honest, it can be intimidating at first.
I remember setting up my first airbrush and feeling like I was piloting a spaceship. But once you get the hang of it, it’s incredible for priming, base coating, and other effects.
A warning: practice on some scrap before you tackle your prized minis. I may have accidentally turned my first airbrush victim into a Jackson Pollock painting…
I remember the first time I used an airbrush. It was like magic! And a mess.
Let me tell you, there is a learning curve. I may have accidentally sprayed half my workspace blue at one point—oops.
But suddenly, those smooth color transitions I’d been struggling with became so much easier. It just took practice.
Drills and pin vises
A pin vise and drill bits might sound boring, but they’re helpful for pinning and modifying.
With these tools, I’ve saved many broken minis. And let me tell you, there’s something oddly satisfying about drilling tiny holes in plastic.
Also, you can drill into your miniature gun barrels to add that depth of realism.

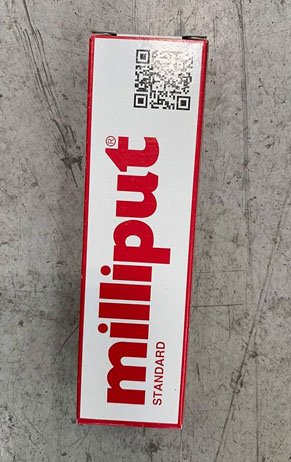
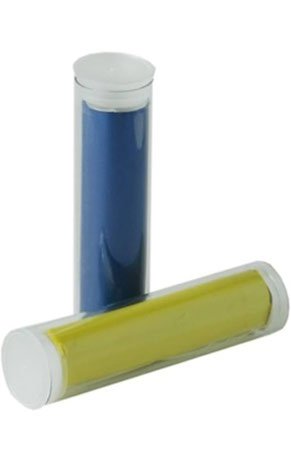
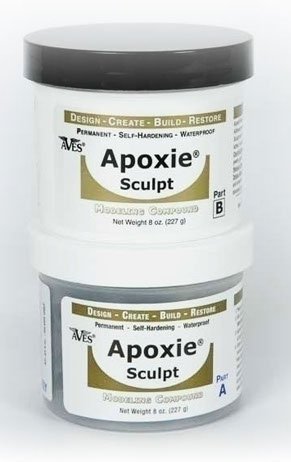
Epoxies and putties
Finally, let’s talk putty.
This stuff is excellent for filling gaps and even some basic sculpting.
I once used it to turn a plain base into a rocky landscape. It didn’t turn out like the picture in my head, but that’s how we learn, right?
Remember, you don’t need to buy all this stuff at once. Add to your kit gradually as you feel the need. And don’t be afraid to experiment! Some of my best techniques came from happy accidents or trying something new.
One thing I’ve learned over the years is that it’s not about having the fanciest tools; it’s about knowing how to use what you have. I’ve seen incredible work done with basic supplies, and people with all the gear in the world produce mediocre results.
The key is practice, patience, and a willingness to try new things. Don’t be afraid to make mistakes—that’s how we learn and grow as painters. Most importantly, have fun with it! We’re painting tiny plastic people, and that’s pretty cool.
Now, if you’re serious about mastering the craft and setting up a professional-level workspace, here’s what you might want to consider:
Professional Setup: Mastering the Craft
Sable brushes
First up, let’s chat about brushes.
When I first got my hands on a set of high-quality sable brushes, it was like painting with clouds. Seriously, the difference was night and day.
Sable brushes are pricier than the synthetics you want as a beginner, but the quality and better brush control make up for it. If you’re serious about miniature painting, you’ll want a few in your paint kit.
But here’s a pro tip: take care of these babies! I learned that leaving them in water overnight is a big no-no. My poor Series 7 brush looked like it had a bad hair day for weeks after that mistake.
Texture paints, pigment powders, and other specialty paints
Now, about paints. As a pro, you’ll want a complete range, including those fancy specialty colors and effects.
I remember the first time I used color-shifting paint on a dragon. It was mind-blowing. But don’t go crazy buying every paint under the sun. I have a collection, and I still haven’t used all the colors.
I’ve ended up with a shelf full of chunky paint in bottles. Oops.
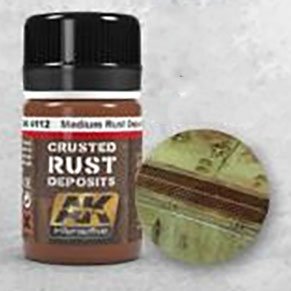
You also want to look into weathering powders. There are many of them in the market, and they all can help enhance your miniatures at this stage.
3D printers
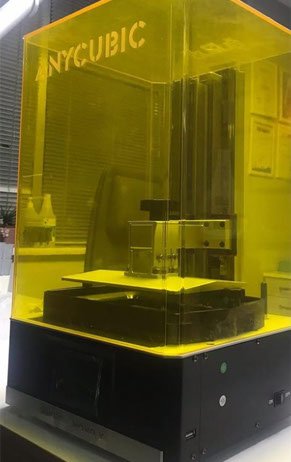
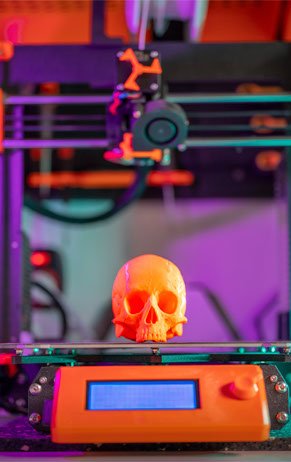
A 3D printer might seem like overkill, but it’s incredible for creating custom parts and bases. I’ve printed some wild stuff with mine.
Fair warning: 3D modeling has its own learning curve. My first attempts looked more like abstract art than the epic monster I was going for.
Photography setup
Let’s not forget about showcasing your work. A good photography setup is critical. I used just to snap pics with my phone and wonder why they looked so… meh. Proper lighting and a good camera make a world of difference. Your minis deserve to be shown off in their best light!
A typical set would have a backdrop, decent lighting, and a camera.
Your smartphone can work as your camera. Most have a powerful enough camera that can take amazing photos.
For lighting, your desk lamp will suffice, though I recommend having two to light either side of the model.
For a backdrop, an oversized sheet of poster board, an old sheet, or anything you can hang to have your minis stand on.
Brush care and maintenance
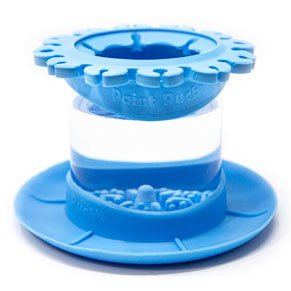
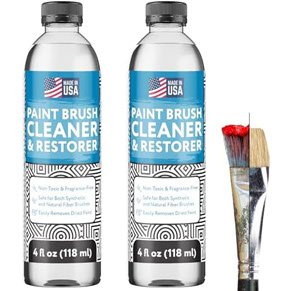
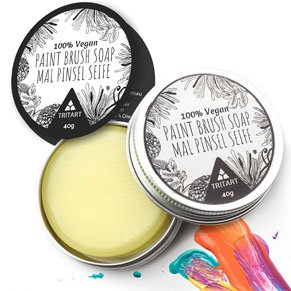
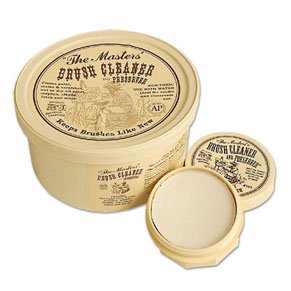
Lastly, let’s talk brush maintenance. Brush soaps, preservers, and related products keep expensive brushes in top shape.
I wish I’d invested in some of them sooner. It would’ve saved some of my early brushes from an untimely demise.
Also, invest in containers designed for brush cleaning.
Just don’t leave your brushes, especially your good ones, to soak overnight.
Here’s the thing about having a pro setup: It’s fantastic, but not everything.
I’ve seen incredible work done with essential tools and mediocre work with top-of-the-line gear. It’s not about having the fanciest setup; it’s about mastering your craft.
Remember, all these tools are just that – tools. They’re there to help you bring your vision to life. The most important things are practice, patience, and pushing your boundaries.
Don’t be afraid to experiment and make mistakes. That’s how we grow as artists.
One last piece of advice: Take your time to have the perfect setup so that you remember to enjoy the process. We’re painting tiny plastic people, and that’s pretty darn cool. So have fun with it!
And hey, if you’re overwhelmed by all this pro-level stuff, don’t sweat it. We all started somewhere.
Over the years, I’ve learned that having the fanciest tools is not just about having the best tools—it’s about knowing how to use what you have.
I’ve seen incredible work done with basic supplies, and people with all the gear in the world produce mediocre results.
The key is practice, patience, and a willingness to experiment. Feel free to try new techniques or make mistakes. Heck, some of my best discoveries came from happy accidents!
Keep painting and learning; before you know it, you’ll advise newbies.
Remember, miniature painting is a journey. You can only need some things at a time. Start small, learn the basics, and gradually expand your toolkit as you grow.
And most importantly, have fun with it! There’s nothing quite like the satisfaction of bringing a tiny world to life with your own two hands.
Prepping Your Miniatures:
From Unboxing to Priming
Oh boy, let me tell you about prepping miniatures!
When I started this hobby, I thought you could just rip open the box and start slapping paint on it. Boy, was I wrong! Let’s dive into the nitty-gritty of getting your minis ready for their glow-up.
Initial Inspection and Cleaning
Let me tell you about the time I learned the hard way why initial inspection and cleaning are so important. Picture this: me, excited as a kid on Christmas morning, ripping open a new box of minis. It was a big mistake.
I had just gotten this miniature game and tore into it as soon as I got home. I took all the pieces out to look at how cool they were.
When I was done, I put the pieces back in the box, only to find that some of them had gone missing. To this day, I haven’t seen them, and probably never will.
First things first, folks. When you get a new mini, take a deep breath and resist the urge to tear into that box like a raccoon in a trash can.
Trust me, I’ve been there.
Carefully open it up and give everything a good once-over. You’re looking for any damage or missing parts. I once started painting a mini, only to realize it was missing an arm halfway through. Talk about a face-palm moment!

to come with it. In this case, I didn’t see any missing pieces from Captain America (Sam Wilson) and
War Machine for Marvel Crisis Protocol.
Now, here’s where things get a bit… soapy.
These minis often come with a mold-release agent. It’s like the mini equivalent of that greasy film on a new frying pan. The first time I painted without washing a mini, my paint beaded up like water on a duck’s back.
Not cool.
So, here’s what you do. Get yourself a bowl of lukewarm water – not hot, we’re not making mini soup here – and add a drop of mild soap. I use dish soap, but anything gentle will do.
Don’t use that fancy exfoliating stuff your partner keeps in the shower.
Trust me on this one.
Gently bathe your mini.
Use an old, soft toothbrush to reach the nooks and crannies. It’s like a spa day for your little plastic pals. Just be gentle—you’re not scrubbing pots and pans here.
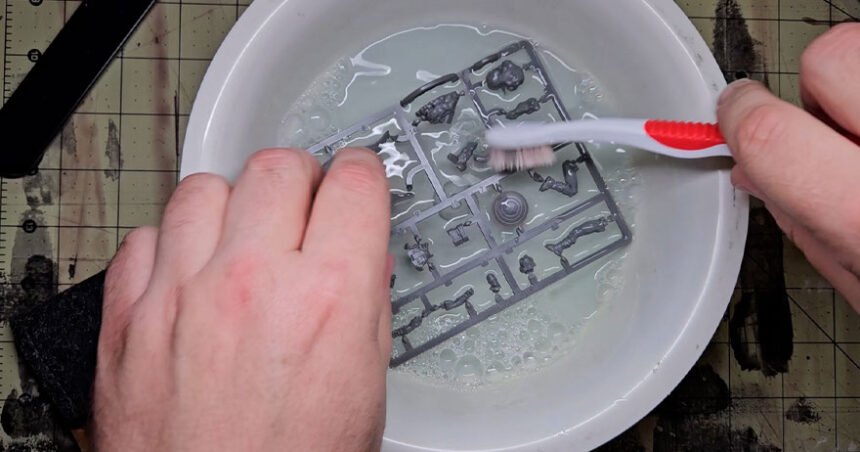
I’m using an old toothbrush here to clean the sprue.
It’s time to dry once you’ve given them a good wash.
I learned this the hard way: don’t use a hair dryer unless you want your mini to look like it’s been melting in the sun. A soft cloth works great. If you’re feeling fancy, you can use compressed air. Just be careful not to blast your mini into the next room. I may or may not have done that once. Okay, twice.
Here’s a pro tip: if you’re working with 3D-printed resin minis, wear gloves when you wash them. I didn’t know this when I started, and let’s just say my hands felt… interesting for a while after.
Remember, folks, this cleaning step is more than just busy work. It’s setting the foundation for all the fantastic paintings you will do later. Think of it as prepping the canvas for your miniature masterpiece.
And hey, if you’re feeling impatient and tempted to skip this step, remember my tale of woe with the beading paint.
Learn from my mistakes!
Your future self will thank you when your paint goes on as smoothly as butter.
So there you have it. Unbox carefully, bathe your models and sprues and dry them off. It’s not glamorous, but an essential part of the mini-painting journey. Your paint job will thank you later.
Assembly Techniques
When it comes to assembly techniques for miniatures, this is where things can either come together beautifully or, well… turn into a glue-covered nightmare.
Trust me. I’ve had my share of mismatched pieces, gaps that seemed small until paint made them glaringly obvious, and arms that wouldn’t stay attached.
Over time, though, I’ve figured out a few tricks that make the whole process much smoother, and I’m happy to share them.
First thing’s first—clipping the miniatures from the sprue.
This is where a proper set of clippers comes in handy. Some miniatures come in model kits, such as games like Warhammer, Marvel Crisis Protocol, or whatever else is in my pile of unpainted games I collect. They sell kits that require some assembly.
So, we need to clip those pieces out carefully.
The best technique I learned for this is to clip the support at the frame of the sprue, then carefully trim back the nub with the clippers’ flat edge facing the bit.
Another tip I learned was to clip out one model at a time. I can’t tell you how many times I glued the wrong piece to a miniature and then had to decide whether to make it work or clip it off and make the right piece fit.
After freeing the pieces from the sprue, it’s time for dry fitting.
If you’re new to miniatures, this is a step you do not want to skip.
Before you even think about pulling out the glue, grab the pieces of your model and fit them together without any adhesive. This helps you see if everything lines up correctly.
I’ll admit, early on, I would rush into gluing things together, figuring the pieces were “probably fine,” only to find out later that the parts were slightly off.
Once the glue sets, though, it’s game over. Now, I dry-fit religiously, especially with multi-part minis. You can even mark areas that don’t fit snugly so you know where to shave or file down later.
It’s time to glue when you’re confident the parts align correctly.
Here’s where I’ve seen many folks go wrong (myself included).
Not all glue is created equal—especially in the world of miniatures.
For plastic minis, plastic cement is your best bet. It melts the plastic slightly, bonding the parts at a molecular level. Sounds fancy, right? But it’s more forgiving than super glue because you have time to adjust the pieces before they are fully set.
Just be cautious not to overdo it with the cement; a little goes a long way, and too much can result in a warped surface.
You’ll want to use super glue instead of plastic cement for metal or resin miniatures. Plastic cement doesn’t work here because resin and metal don’t “melt” like plastic.
The thing with super glue is that it’s fast—sometimes too fast. I’ve had more than one instance where I thought I had everything positioned just right, only to realize a millisecond too late that the arm was ever-so-slightly crooked. So, work carefully and double-check alignment before the glue sets.
For larger or heavier pieces, pinning is a real game-changer.
If you’ve never pinned a mini before, it’s essentially inserting a small metal pin (usually a cut piece of paperclip or brass rod) between two parts to help hold them together. It gives that extra stability that glue alone can’t offer.
For weight-bearing parts like wings or big weapons, pinning prevents them from sagging or breaking off over time. It’s a bit of extra effort, I won’t lie, but it saves you from that dreaded moment when a piece snaps off right after you’ve finished painting it. Been there, done that.
And then, we’ve got gap-filling.
I used to ignore this step—thinking, “Eh, it’s not that noticeable.” But once I started priming, those gaps became about as apparent as a flashing neon sign.
So yeah, take your time with the assembly. Clip your parts out carefully. Dry fit those pieces, pick the right glue, and don’t shy away from pinning or gap-filling if the situation calls for it.
This stage is the foundation for everything that follows, and you’ll save yourself a ton of frustration by getting it right from the start. Plus, there’s nothing more satisfying than seeing a perfectly assembled mini just waiting for its paint job.
Removing Imperfections
Alright, let’s talk about removing imperfections on miniatures. Man, this part can feel like a test of patience, but trust me, it makes all the difference between a mediocre figure and a polished piece that looks straight out of a pro’s display case.
I remember the first time I sat down with a new miniature—a Reaper Bones model, though I can’t quite recall which one—and I was so eager to get to painting that I ignored the mold lines or little bits of flash sticking out. It was a huge mistake. I thought, “Eh, the paint will cover it.”
Spoiler: it does not. You end up with these weird, raised lines or random bumps, and they stick out like a sore thumb once everything’s painted. So, let’s avoid that headache.
The first step in tackling these imperfections is lighting.
Seriously, lighting is your best friend here. I can’t stress enough how bright, directional lighting is key to spotting every single mold line and bit of flash. Grab yourself a strong desk lamp (I use one of those adjustable LED lamps) and angle it so the light hits your miniature at an angle. The shadows created by the mold lines will jump out at you.
It’s incredible how even the tiniest line can go unnoticed in regular lighting but becomes apparent with proper illumination. Sometimes, I even rotate the mini slowly under the light to ensure I’m not missing anything sneaky. You’d be surprised at how much more you catch that way.
Once you’ve identified the mold lines or flash, the next step is removing them—carefully.
Get yourself a proper hobby knife or a mold line remover tool. If you’ve never used one, the mold line remover has a curved blade designed for scraping without digging into the figure. The key here is to use gentle, controlled movements. I’ve messed up by getting impatient and scraping too hard, which removes too much material and leaves little marks that you have to smooth out later.
After scraping, I always run my finger over the area.
You’d think you could see if it’s smooth, but I swear your fingertips are more reliable for checking imperfections. If it still feels rough, I move on to fine-grit sandpaper. I’m talking super fine—like 400 or 600 grit. Anything coarser than that risks scratching the mini’s surface and leaving blemishes.
I usually cut a small piece of sandpaper and wrap it around a toothpick or use one of those fine sanding sticks to get into the nooks and crannies. Go slow and be methodical; it’s all about finesse here.
One trick I picked up along the way is wet sanding. It’s not always necessary, but sometimes, especially for resin kits and models, wetting the sandpaper can help you avoid the fine dust getting everywhere. You don’t want to overdo it and drench your sanding device. A slight dampness does the trick.
Honestly, taking the time to prep your minis like this feels tedious at first, but once you’ve got them primed and start laying down paint, you’ll be so glad you did. Those mold lines that used to haunt me in my early painting days? Gone. It’s a little victory every time. So yeah, give those imperfections the boot with careful lighting, the right tools, and patience.
The Art of Priming
Ah, the art of priming. You might think priming is just a quick, throwaway step before diving into painting, but it’s one of the process’s most crucial parts. I learned that the hard way after rushing through it more times than I’d like to admit. Skimp on this step, and you’re setting yourself up for a world of hurt—trust me.
Let’s start by picking the right primer color. When I first started, I’d just grab whatever was on hand—usually black—without much thought. That was a bad idea.
The color of your primer makes a big difference, depending on your painting plan. Black primer works wonders if you’re going for darker tones or gritty, shadow-heavy minis. It helps deepen shadows naturally, and you won’t have to fight against a bright undercoat. But white primer is your friend if you aim for bright, vibrant colors.
I remember priming an entire squad of allied infantry and then struggling for hours to get their skin tones to pop. If I had started with a white primer, it would’ve saved me a ton of layering and frustration. Gray primer, by the way, is the happy medium when you’re not sure whether you’re going light or dark. It’s neutral so that it won’t skew your color choices too far in either direction.
Now, whether to go with spray or brush-on primer—it depends.
Spray primer is excellent for getting smooth, even coverage quickly, especially if you’re working on multiple minis simultaneously. I’m a fan of spray primers for army projects where efficiency is critical. The trick is to apply it in thin, even coats.
I made the mistake of being too heavy-handed with the spray, and the primer obscured details.
It’s a sinking feeling when you see all that hard-earned detail vanish under a thick coat of primer. Keep your distance, about 8-12 inches, and spray in short bursts rather than a continuous stream. It’s a slower process, but you won’t risk clogging up the mini’s finer details.
Conversely, brush-on primers are great when you want more control, especially for delicate or intricate models.
With brush-on primer, you can target specific areas, make sure you don’t miss any spots, and control the thickness of each layer. It’s also handy when the weather doesn’t cooperate—because, let’s face it, spraying primer in humid or rainy conditions sucks.
This is my go-to during the colder seasons where I live. I hate being in the cold and priming models.
Speaking of tacky surfaces, you’re asking for trouble if you don’t give the primer enough time to dry between coats.
I’ve been guilty of impatience here. It’s easy to get excited and want to move on to painting ASAP, but rushing the primer can lead to some ugly results. You end up with a surface that feels sticky or doesn’t hold paint well, and then you’re back to square one.
Let each coat dry completely before applying another—usually about 15-30 minutes, depending on the primer.
If it feels even a little tacky, wait longer. I’ve found that working on multiple miniatures at once helps keep me occupied while I’m waiting for drying times. You can cycle through them, so you’re not sitting around watching paint (or primer) dry.
One last thing I’ve learned is always to check your work after priming.
I used to assume I’d covered everything and jump straight to painting, only to find weird bare patches in the recesses or underarms. Now, I give my minis a quick once-over after each coat of primer, rotating them in the light to ensure I didn’t miss any spots. It’s a simple habit but saves a lot of time and headaches.
So yeah, priming might seem like an essential step, but the care you put into it pays off later. Choose the right color, be thoughtful about your application method, and have the patience to let it dry properly. Do that, and you’ll have a perfect canvas for your paint job.
Advanced Priming: Zenithal Highlighting
Ah, zenithal highlighting, the technique that feels like magic the first time you try it. It’s like giving your miniatures a head start before you even touch a paintbrush.
If you’ve never tried this before, it might seem intimidating, but once you get the hang of it, you’ll wonder how you ever lived without it. I was late to the zenithal party, but now it’s one of those things I can’t skip, especially when I want to achieve dramatic lighting effects or speed up my painting process.
Here’s how it works: you start with a dark primer, usually black as your base coat. This is crucial because the black acts as your deepest shadow layer, automatically giving your mini a sense of depth right from the start.
I remember the first time I primed a mini black for zenithal highlighting, and it looked like I’d just dipped it in ink. It feels like you’ve buried all the detail under this heavy, dark layer, but stick with it.
The next step is where the magic starts to happen. You apply a gray primer (or paint) from a 45-degree cone above the miniature.
This is meant to simulate natural light hitting the figure from above. It creates softer highlights while preserving some of those deep shadows you laid down with the black.
When I first tried this, I was blown away at how just that single angle started to bring the figure to life. It’s like watching a sketch get its first touch of shading—it suddenly starts to take shape, and you begin to see how the lighting will play out once the paint goes on.
You want to be careful here; keep the primer light and build up gradually. I’ve overdone it in the past, and instead of subtle shading, I ended up with blotchy patches of gray that I had to work around later.
Now, for the final touch: a light dusting of white primer directly from above.
This is the zenithal highlight, mimicking the pinnacle point of your light source directly overhead—think of it like sunlight or a spotlight. I like to keep the spray quick and subtle, just a few bursts. Too much, and you risk losing the gradient you’ve just created between the black, gray, and white.
This step sells the whole effect, creating natural highlights on the raised surfaces, like the top of the head, shoulders, and anything else facing upward. It’s a tremendous transformation; your mini is already wearing a coat of paint with shadows and highlights built in. I always find myself just staring at the mini for a bit after this step—there’s something so satisfying about seeing it lit so naturally.
One of the reasons I love zenithal highlighting is that it helps guide your painting process.
It’s like having a cheat sheet for where your highlights and shadows should go. If you’re like me and sometimes struggle with visualizing where the light should fall, zenithal highlighting practically does it for you. I used to spend so much time agonizing over lighting placement, but now I can follow the guide the primer already has set.
Plus, Zenithal is an absolute lifesaver if you’re into techniques like glazing or contrast painting. The pre-shaded mini means you can apply thin layers of paint, letting the light and dark areas show through, greatly speeding up the process. When I discovered this trick, it was like cutting my painting time in half while still getting great results.
Another cool thing about zenithal highlighting?
It’s versatile.
You can tweak it depending on the effect you’re going for. Want a more intense contrast? Use a darker black base and a stronger white highlight. Are you looking for something subtler? Go with gray as your base, and use white only sparingly.
I’ve even experimented with adding a slight tint of color to my primer, like using a cool blue for an icy effect or a warm beige for a sunlit look. That’s the fun part—you can play around with it and make it work for whatever vibe you’re going for.
Of course, zenithal highlighting isn’t without its quirks.
It took me a few tries to figure out the proper distances and angles to spray from, and there were some early misfires where I either over-highlighted or didn’t create enough contrast. But that’s all part of the learning curve.
Now, I can usually eyeball it and adjust on the fly, which shows that practice makes perfect—or, at least, close enough to perfect!
So, if you haven’t tried zenithal highlighting yet, give it a go.
It’s one of those advanced priming techniques that sounds fancy, but it’s super intuitive and worth the extra effort in practice. It’ll give your minis natural shadows and highlights before you’ve even picked up a brush, and that’s a massive win in my book. Plus, it just looks fantastic, and isn’t that half the fun?
Final Preparations
Final preparations before painting are like the calm before the storm. You’re almost ready to dive into the real fun, but taking time to ensure everything is perfect will save you from frustration later on.
I used to jump right into painting the second I thought the primer was dry, and let’s just say that led to more than a few frustrating moments where I had to backtrack. I’ve learned that a little extra patience here pays off big time in the end.
The first thing I do after priming is give the miniature a good, hard look under strong lighting. I inspect every nook and cranny to make sure the primer has done its job evenly.
Even after all the care we took to apply it, sometimes you’ll spot areas that didn’t get full coverage. Maybe the primer missed a deep recess, or you accidentally sprayed too thick in one spot, and the details look clogged. It’s easy to overlook these issues in your excitement to start painting, but trust me, take the time to double-check everything.
You’ll thank yourself later when the paint goes smoothly without any weird, patchy areas.
If you notice any spots that need fixing, now is the time to break out the brush-on primer.
Brush-on primer is a godsend for those minor touch-ups that spray primers sometimes miss. I’ve had moments where I thought I nailed the priming process, only to discover that the undersides of arms or tiny details like belt buckles were still bare.
A quick touch-up with a fine brush and some brush-on primer, and I’m back in business. Keep your coats thin—you don’t want to undo all the careful priming work by laying it on too thick. This is especially important for those tiny, delicate details where a thick primer can ruin the intricacies of the sculpt.
Once everything’s touched up and looking good, the next step is one of the hardest for me: letting the miniature fully cure.
I’ve been more than guilty of rushing this part only to have the primer peel or feel tacky under the first layers of paint. Let the primer cure completely, not just dry to the touch.
Depending on the primer you used, this could take anywhere from a few hours to overnight. I’ve found that letting it cure overnight is the safest bet. Yes, it’s frustrating when you’re eager to start painting, but this waiting period ensures that your paint will adhere correctly and that the primer won’t react weirdly to your paints later. Trust me, it’s worth the extra time.
While you wait for the primer to cure, this is the perfect opportunity to plan your color scheme.
Some people can wing it, but I’m not one of them.
I used to think I could figure out the colors as I went, but that always led to a hodgepodge, unfocused look. Now, I take this time to think through the colors I want to use, and sometimes, I even sketch out rough ideas or gather reference photos.
For example, if I’m painting a knight, I’ll look up armor patterns or historical references. If it’s a fantasy character, I might dig into art books or Pinterest for inspiration. Having a plan makes the painting process smoother and less stressful, especially when facing down a more complicated mini with many little details to tackle.
Gathering reference materials can be a game-changer, too.
I used to think reference images were only for people doing historical minis, but even for fantasy or sci-fi models, having visual cues to guide your painting is incredibly helpful. It keeps you on track and helps you visualize how different colors and shades will work together before you pick up a brush.
Whether it’s photos of real-world textures like weathered wood and rusted metal or art from other painters, having these references on hand can inspire you and help you avoid color clashing.
So, the final prep phase is all about patience and planning. It’s your last chance to fix any issues before paint hits the surface, and it’s a great time to visualize the final look of your mini.
Take the extra time to inspect, touch up, and cure, and you’ll confidently go into the painting stage knowing everything’s prepped to perfection. Once you start painting, you’ll be glad you set yourself up for success!
Color Theory and Painting Techniques
for Miniatures
When it comes to miniature painting, mastering color theory and basic painting techniques is the key to taking your minis from average to genuinely eye-catching. It’s one of those things that feels intimidating at first, but once you start breaking it down and applying it to your work, it becomes second nature.
Let’s dive into the essentials of color theory and some painting techniques to help you bring your miniatures to life.
Understanding Color Theory
First off, let’s talk about color theory.
It’s the foundation of all good painting and can make a difference when choosing a color scheme for your miniatures.
The color wheel is a classic tool for visualizing relationships between colors. Your primary colors—red, blue, and yellow—are the building blocks for all other colors.
The secondary colors—green, orange, and purple—were created by mixing two primary colors.
Finally, tertiary colors are created by mixing primary and secondary colors, such as blue-green or red-orange.
Understanding this helps create more cohesive and harmonious color schemes for your miniatures.
Speaking of harmony, one of the best ways to ensure your miniatures look visually appealing is by considering color harmony.
You can use several different schemes, but the main ones to remember are complementary, analogous, and triadic.
Complementary colors, like blue and orange, sit opposite each other on the color wheel, creating a nice contrast that makes each color pop.

Analogous colors, such as red, orange, and yellow, are next to each other on the wheel, giving a more harmonious and unified look.

Triadic schemes use three colors evenly spaced around the wheel, such as red, blue, and yellow, for a vibrant, balanced result.
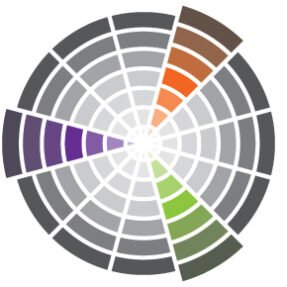
Many more color schemes are available, but these few are enough for anyone to get started.
When planning your minis, consider these relationships to make your colors work together more dynamically.
Another thing to consider is the use of warm and cool colors.
Warm colors, like reds, oranges, and yellows, tend to bring energy and make areas of your miniature feel closer or more intense.

Due to their positioning on the color wheel, cool colors, such as blues and greens, can evoke a sense of coldness and distance in any paint scheme.

Warm colors on key focal points, like a hero’s cloak, and cooler tones on the background or base can help guide the viewer’s eye across your miniature.
Finally, understanding value and saturation is crucial.
Value refers to the lightness or darkness of a color, which helps you create depth and contrast in your miniature.

Saturation, on the other hand, refers to the intensity of the color. Intense, saturated colors draw attention, while more muted tones can recede into the background.

Playing with these elements helps you emphasize certain parts of the miniature and make it feel more three-dimensional.
Essential Miniature Painting Techniques
Now, on to painting techniques, which are just as important as your color choices when making your miniatures stand out.
Step 1: base coating
The first technique you’ll need to master is base coating. This is the foundation of any paint job, and it’s all about laying down a smooth, even layer of color over your primed miniature.
One of the most significant mistakes of beginners is using paint straight from the bottle.
You’ll want to thin your paints slightly with water or a medium to avoid clumping and ensure smooth application. By applying multiple thin layers instead of one thick one, you’ll aim for an even coat.
When choosing your base colors, think back to your color scheme and pick hues that will serve as the mid-tone for later highlights and shadows.
Step 2: shade/wash
Washing or shading is the next step.
A wash is a thinned-down paint or ink applied over the miniature, allowing it to flow into the recesses and enhance the shadows. You can buy pre-made washes or make your own by mixing paint with water or a medium.
Apply it generously to areas where you want deeper shadows, and let the wash add depth to your model. Just clean up any excess wash on the raised areas or flat surfaces to avoid it pooling where you don’t want it.
Step 3: layering and highlighting
Once your shade or wash is dry, it’s time to start layering. This technique involves adding successive layers of paint to build depth and volume on your mini.
The key here is to use gradual color transitions.
Start by mixing a little bit of a lighter shade into your base color and apply it to the raised areas of the miniature where the light would naturally hit. You can create shadows by doing the reverse—mixing in a darker shade and painting it into the recesses.
The goal is to create a smooth gradient between the shadow and the highlight.
You’ll want to practice edge highlighting for those sharp, clean edges. This is where you pick out the raised edges of your mini with a lighter color to make them pop.
It’s a technique that adds a lot of definition and sharpness to your miniature, especially on armor or weapons.
The trick is to use a fine brush and keep your hand steady—one skill that improves with practice! You want to be selective about where you apply this technique, focusing on edges that would naturally catch the light.
Another technique you’ll use frequently is dry brushing. This one adds texture and quick highlights to surfaces like fur, hair, or rough terrain.
To use the dry brush technique, take a brush with stiff bristles, dip it into the paint, and then wipe most of the paint off on a paper towel until only a little remains on the brush. Then, lightly drag the brush over the surface of your mini.
It catches the raised areas and leaves the recessed areas untouched, creating a nice highlight effect with minimal effort.
These basic techniques—base coating, shading or washing, layering, edge highlighting, and dry brushing—are the building blocks for creating well-painted miniatures. With some practice, you can combine color theory and these painting methods to create minis that stand out on the tabletop!
Advanced Miniature Painting Techniques
Once you’ve mastered the fundamentals, advanced miniature painting techniques can elevate your miniatures to a whole new level of realism and artistry.
Techniques like blending, object source lighting (OSL), and weathering may seem intimidating initially. Still, with some practice and patience, you’ll find they add incredible depth and visual interest to your models.
Let’s break down some of these more advanced techniques so you can start incorporating them into your work.
Blending Mastery
Blending is one of the most critical techniques for smooth color transitions, especially on larger surfaces like cloaks or wings.
There are several methods for blending paint on miniatures, but they all rely on controlling the paint’s consistency. Too thick, and you’ll end up with harsh lines; too thin, and the paint might run or pool.
Wet blending
One of the most popular methods for seamless transitions is wet blending. This involves applying two or more colors while the paint is still damp, allowing you to mix them directly on the miniature.
It takes some practice because you have to work quickly before the paint dries. The key is to keep your brush damp (but not too wet) and use soft, sweeping motions to merge the colors.
Wet blending is especially useful on large, smooth surfaces like capes or flowing robes, where you want a gradual color shift.
Two-brush blending
Another technique you can try is two-brush blending. With each brush loaded with paint, you use each brush to gently blend each color into each other for your paint application.
This method offers more control than wet blending, allowing for quicker working time. You don’t need to stop and clean your brush between each color application.
Feathering
For an even softer transition, you should experiment with feathering. This involves drawing the paint in a zig-zag manner until the paint becomes transparent. The results are beautifully smooth gradients, especially when working with colors that need to blend seamlessly without any visible lines.
Non-Metallic Metal (NMM)
The non-metallic metal (NMM) technique can really make your miniatures stand out. It mimics the appearance of metal using only non-reflective paints.
This technique relies heavily on understanding how light interacts with metallic surfaces and strategically placing highlights and shadows to create the illusion of shine.
For example, painting gold requires a specific color palette, often using a mix of yellows, browns, and whites to simulate that metallic sheen.
The trick with NMM is mastering extreme highlights and deep shadows.
Metals reflect light very intensely, so you’ll need to push your contrast to the extreme.
Start by mapping out where your light source is coming from, and then lay down your base colors. From there, build up the highlights where light would reflect most strongly, such as the edges and sharp corners, and deepen the shadows in areas where light would be blocked.
The NMM effect is sold by creating the illusion of reflections.
For silver, you might use grays and blues to mimic cool reflections, while warmer tones like yellow and orange will work for gold.
It’s important to remember that the reflections on metal are often sharp and distinct, so use crisp lines and high-contrast highlights for the most realistic effect.
Object Source Lighting (OSL)
Object-source lighting (OSL) is all about creating the illusion that a part of your miniature is emitting light and that the light is affecting the surrounding surfaces.
Whether it’s a glowing sword, a lantern, or even magical energy, OSL can bring a whole new dimension of realism and drama to your miniatures.
The first step in OSL is identifying your light source and establishing where the light would naturally fall. Once you have that figured out, you’ll need to decide on the color and intensity of the light.
For instance, a glowing blue crystal would cast cool, bluish light, while a torch would throw out warm oranges and yellows.
- When painting the glow effect, the brightest area must be kept right at the source, with the light fading as it moves away.
- Use thin layers of paint—almost like glazes—building up the color gradually. The surrounding areas should reflect the light color, but it’s essential to balance OSL with the overall composition. If the light overpowers everything, it can detract from the rest of the miniature.
Weathering and Battle Damage
Adding weathering and battle damage to your miniatures can tell a story and add realism. Rust, dirt, and grime effects can be achieved with washes, stippling, and unique weathering pigments.
For example, you might simulate rust on a metallic surface by stippling brown and orange paint layers, gradually building up the texture until it resembles corroded metal.
A technique called “sponge weathering” can be effective for battle damage, such as chipping and scratches.
Dabbing a sponge loaded with paint onto the edges of armor or weapons creates a random, worn effect that looks like chipped paint or metal. You can also use a fine brush to paint on scratches, focusing on areas that would logically experience wear and tear, like the edges of shields or swords.
To add mud splatter or dust effects, use diluted paints or pigments with a stippling brush or toothbrush. Lightly flicking paint onto the lower sections of your miniature can mimic splashes of mud or dust kicked up from the battlefield.
Freehand Designs and Patterns
Adding freehand designs to your miniatures is a great way to personalize them and showcase your skills.
Whether it’s intricate patterns on a knight’s banner or runes on a wizard’s cloak, freehand painting requires planning and steady hand control.
Start by sketching out your design lightly with a pencil or thinned-down paint. This will give you a roadmap to follow so you’re not painting blind.
When applying the design, use a fine brush with a good point. Work slowly and steadily, building up the design in layers if needed. Adding freehand designs is particularly effective on larger, flat surfaces like banners, shields, or the back of a cape.
Glazing for Color Refinement
Glazing is a subtle yet powerful technique that can help refine your colors, smooth out transitions, and unify different areas of your miniature.
Glazes are created by thinning down your paint significantly, allowing the underlying colors to show through while subtly tinting the surface. This technique is handy for enhancing shadows or adjusting highlights without repainting entire areas.
For example, if your shadows aren’t deep enough, applying a thin glaze of a darker color can enrich them without obscuring the detail beneath. Similarly, glazing with a transparent wash of the dominant color can help unify a miniature’s color scheme.
Texturing Techniques
Creating realistic textures on your miniatures can bring them to life. Different materials require different approaches.
- For leather, use stippling or fine brush strokes to mimic the appearance of worn, uneven surfaces.
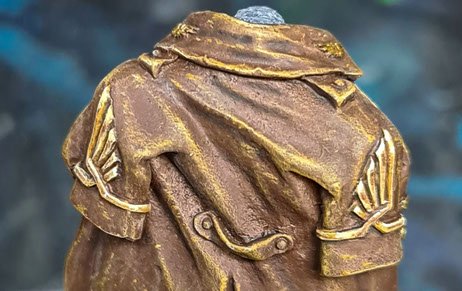
- Wood can be achieved with directional brushstrokes to replicate the grain, while stone might be textured using a stippling brush or dry brushing to create rough, porous surfaces.
- You can even incorporate mixed media, like small cloth or sand, for added realism. For example, adding actual fabric to a miniature’s base can create convincing bedrolls, or using bits of cork can simulate rocks and debris.

Advanced Basing and Scenery
Finally, remember the base!
Advanced basing can turn a simple figure into a dynamic scene, full of life and story.
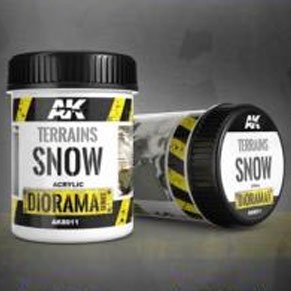
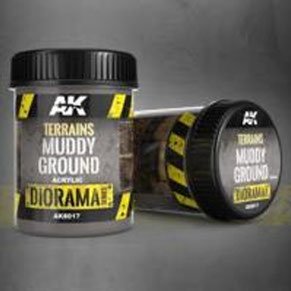
You can use everything from simple sand and gravel for basic terrain to resin techniques for water effects or sculpted elements made from epoxy putty. Adding weathering powders, pigments, and small environmental details like grass tufts or fallen leaves can add atmosphere and context to your miniature, making it look like it’s part of a living, breathing world.
With these advanced techniques, you can push the boundaries of your miniature painting and bring your models to life in exciting, new ways.
Practice makes perfect, and as you get comfortable with each method, your miniatures will begin to tell their own stories through color, light, texture, and detail.
Painting Specific Elements: A Deep Dive
Painting miniatures involves much more than just slapping some color on a model. Each element of your miniature offers its own challenges and opportunities for artistry.
Whether you’re trying to get skin tones just right or make a piece of armor shine with realistic battle damage, understanding the nuances of painting specific elements will improve your work.
Here’s a detailed look at how to tackle various aspects of miniature painting.
Mastering Skin Tones
When painting skin tones, it’s all about achieving that natural, lifelike quality.
Start by mixing your colors. You might use a mix of flesh tones with a hint of pink or yellow for lighter skin tones. For darker tones, start with a base of deeper browns or reds, adjusting as needed.
The goal is to build up a range of shades that mimic the natural variation in human skin.
Layering techniques are crucial here.
Begin with a base coat that covers the entire area. Once that’s dry, apply a lighter tone to highlight the raised areas like cheekbones and the bridge of the nose.
For deeper shadows, use a darker shade around the sides of the nose, under the chin, and around the eyes. Blending these colors smoothly will help you avoid harsh lines and create a more realistic skin texture.
Adding subtle details like blushing or pallor can make your miniature stand out. A touch of pink on the cheeks or a hint of blue around the eyes can add depth and realism.
Don’t overdo it; a little goes a long way, and these details should enhance rather than overpower the base tones.
Bringing Fabrics and Textiles to Life
Fabric textures are another critical area for achieving realism.
Different fabrics, such as silk, leather, and wool, require different approaches.
To mimic silk’s sheen, you’ll want smooth, even layers with a glossy finish.
Leather should have a more matte, textured look, so use stippling or dry brushing to create that worn, rugged appearance.
Wool can be textured with a dry brush by stippling to give it a fluffy, uneven surface.
Creating realistic folds and creases involves understanding how light and shadow interact with fabric. Use darker colors in the folds and lighter shades on the raised areas to simulate how light would naturally hit the material.
Perfecting Hair and Fur
Hair and fur can be particularly challenging but also rewarding.
For different hair types, use varying techniques.
- For straight hair, paint in long, flowing strokes, gradually layering lighter colors for highlights. For curly hair, use a stippling technique to build up the texture.
- Long hair might require more detailed work to capture each strand, while short hair might be more about capturing the overall flow and sheen.
When it comes to fur texture, a dry brushing technique works wonders.
- Use a brush with stiff bristles and a dry, almost powdery paint to lightly dust the fur, highlighting the raised areas and giving it a realistic texture. Highlighting and shading are crucial here; they help add volume and create a sense of depth.
- For animal pelts and manes, pay attention to the natural patterns and direction of the fur to ensure it looks convincing.
Crafting Eye-Catching Gems and Magical Effects
Gems and crystals can add a lot of visual interest to your miniatures.
To paint convincing gemstones:
- Start with a dark base color and layer progressively lighter shades to create the illusion of depth.
- Use a fine brush to add highlights where the light would hit and shadows where it would be blocked.
For a realistic glow effect, combine glazes and dry brushing to create a soft, ethereal look.
Creating magical effects like energy crystals or glowing runes involves using techniques like OSL (Object Source Lighting).
- Start by painting the source of the light with bright, intense colors.
- Then, use a thinner paint to extend the glow to the surrounding area, blending it to create a gradient effect.
- Incorporating reflections and light refraction can also enhance the illusion of magic and power.
Detailing Weapons and Armor
Weapons and armor are where you can show off your skills. Different metals like steel, bronze, and gold each have their look and require specific techniques.
For steel, use a base of dark gray and build up to lighter grays and whites for highlights.
Bronze can be painted in warm, reddish tones and highlighted with bright golds or oranges.
Gold itself should have a base of yellow or orange, with highlights of almost white to mimic its reflective quality.
Creating battle damage and wear involves adding chips, scratches, and dents using techniques like sponge weathering or dry brushing.
For intricate designs on armor plates, like engravings or decals, use a fine brush and steady hand to paint detailed patterns. You can also add magical runes or enchantments by carefully painting symbols in contrasting colors and highlighting them to stand out against the base armor.
Bringing Life to Faces and Expressions
Faces are the most expressive part of your miniature, and capturing emotion can make your model indeed come alive.
Start with a solid base and use subtle highlights and shadows to enhance features like the eyes, eyebrows, and mouth.
Painting eyes is often considered one of the most challenging aspects, but focusing on details like the iris and pupil can make a big difference.
Add small touches like scars, tattoos, or markings to give your miniature more character and backstory.
Crafting Stunning Bases and Terrain
The base is more than just a platform; it’s an integral part of your miniature’s story.
Techniques for creating various ground types exist, including using textures like sand, gravel, or baking soda to mimic different environments.
For water effects, use UV resin or gloss varnish to create realistic puddles or streams.
Adding scenic elements like trees, ruins, or debris can enhance the overall scene and make it more engaging. Ensure that the base complements your miniature without overshadowing it.
Painting Non-Organic Elements
Lastly, non-organic elements such as wood, stone, or mechanical parts require different techniques.
For wood grain, use a fine brush to paint the grain patterns and dry brush highlights to give the texture depth.
Stone and brick textures can be achieved with stippling and dry brushing, emphasizing the rough, uneven surfaces.
For glass or transparent materials, thin layers of paint and extensive glazing are used to simulate clarity and reflection.
Mechanical and technological elements often require a more precise approach, with detailed painting to capture the metallic sheen and intricate parts.
Troubleshooting Common
Miniature Painting Issues
No matter how experienced you are, every miniature painter encounters issues from time to time. Knowing how to address these problems without letting them derail your project is key.
From fixing mistakes to dealing with paint consistency issues, here’s a guide to troubleshooting some of the most common painting hiccups.
Fixing Paint Mistakes and Touch-Ups
We’ve all been there: a slip of the brush, a misapplied color, or an overzealous wash can lead to frustrating mistakes.
The good news is that most paint errors are fixable with a bit of patience.
- If you’ve made a mistake, clean your brush before attempting any fixes. Once clean, gently rub away the offending paint with a bit of water or alcohol, depending on the type of paint used.
- Use a brush of the appropriate size for touch-ups and carefully apply your base color to the affected area. Blend the new paint with the surrounding area to avoid noticeable lines or patches.
- If the mistake is on a larger area, you might need to reapply base coats and highlights to ensure the color matches the rest of the miniature. Take your time, and remember that most mistakes are less noticeable once everything is finished and varnished.
Dealing with Paint Consistency Problems
Paint consistency can make or break your miniature painting experience. Too thick, and you’ll struggle with coverage and details; too thin, and you risk pooling or streaking.
- If your paint is too thick, add a few drops of water or medium to thin it out, but be cautious not to overdo it—too much thinning can reduce coverage and lead to a chalky finish.
- Conversely, if your paint is too thin, you may need to build up several layers to achieve the desired opacity. Ensure each layer dries completely before applying the next.
- A wet palette can help maintain the proper consistency throughout your painting session by keeping the paint from drying out too quickly.
Rescuing a Botched Wash or Shade
Washes and shades can sometimes go awry, leaving your miniature uneven or too dark.
- If your wash pooled in unwanted areas or left streaks, use a clean, damp brush to lift away the excess wash gently.
- For large areas where the wash is too dark, you can lighten it by applying a light dry brush or layering a lighter color on top once the wash has dried.
- If you’re dealing with a muddy wash or one that’s settled too much in the recesses, you might need to reapply a lighter wash to balance it or blend it better with the surrounding areas.
- Another trick is to use a glaze to tone down the wash and create smoother transitions.
Correcting Brush Stroke Issues
Brush strokes are often a result of too thick paint or simply a lack of technique.
- If you notice brush strokes in your work, ensure your paint is thinned correctly. You might also want to switch to a finer brush or use a softer brush better suited for smooth applications.
- To fix existing brush strokes, gently blend the area with a clean, damp brush or sponge to soften the lines.
- Another method is to apply a thin glaze layer over the area to help blend and smooth out the strokes. To avoid disturbing the underlying paint, let each layer dry thoroughly before proceeding.
Salvaging a Poorly Primed Miniature
Poor priming can lead to many problems, including paint adhesion issues and unsightly texture.
- If your primer coat is too thick, causing a rough texture, you can lightly sand it down with fine-grit sandpaper once fully dry.
- If you have missed spots, apply a thin primer layer.
- It might be best to strip the paint and start over for poorly primed miniatures now suffering from paint chipping or poor adhesion.
- Use a safe paint remover and a mix of water and dish soap to clean the miniature thoroughly before reapplying a fresh coat of primer.
Each of these troubleshooting tips is about understanding what went wrong and applying corrective measures with patience. Painting miniatures is an art that often involves trial and error; learning how to fix issues as they arise is a crucial part of the process.
With practice, you’ll become more adept at spotting and resolving problems quickly, leading to more satisfying results in your miniature painting endeavors.
7 Tips for Miniature Painting Improvement
If you’re serious about leveling up your miniature painting skills, you’re in for a rewarding journey. Whether you’re just starting or looking to refine your techniques, here are seven essential tips to help you improve and get the most out of your hobby.
- Practice Regularly. The adage “practice makes perfect” is especially true in miniature painting. The more you paint, the better you understand your materials and techniques.
- Set aside time each week to work on your miniatures, even if it’s just for a short session. Regular practice will help you develop muscle memory, improve your brush control, and refine your technique.
- Don’t be discouraged by early mistakes—each piece you paint contributes to your overall skill development.
- Experiment with Different Techniques. Painting miniatures is as much about creativity as it is about skill. Don’t hesitate to step out of your comfort zone and try new techniques.
- Whether blending, dry brushing, or exploring advanced methods like non-metallic metal (NMM) or object source lighting (OSL), experimenting with different approaches will broaden your skill set and open up new possibilities.
- Even if a technique doesn’t turn out as planned, it’s a valuable learning experience contributing to your growth as a painter.
- Join Online Communities and Forums. Online communities and forums are fantastic resources for miniature painters.
- Sites like Reddit, Facebook groups, and dedicated painting forums offer a wealth of knowledge, from tips and tutorials to feedback on your work.
- Engaging with fellow painters can provide inspiration, support, and constructive criticism. Plus, sharing your work and participating in community challenges or group projects can keep you motivated and connected with others who share your passion.
- Watch Tutorials and Demonstrations. A treasure trove of tutorials and demonstrations is available online, from YouTube videos to specialized streaming platforms.
- Watching experienced painters at work can give you insight into their techniques and approaches. Look for tutorials focusing on specific skills you want to improve or tackle areas where you struggle.
- Seeing different techniques in action can also spark new ideas and help you understand how to apply various methods to your projects.
- Take Inspiration from Other Painters. Inspiration is a powerful motivator.
- Browse miniatures galleries on websites, visit local painting competitions, or follow skilled painters on social media. Analyzing their work can help you understand how they achieve specific effects, from color schemes to detailing.
- Don’t copy their work directly; let their creativity inspire your projects. Adapt their techniques to suit your style and experiment with integrating their ideas into your miniatures.
- Patience is Key. Miniature painting is not a race; it’s about achieving the best results you can. Rushing through a project often leads to mistakes and less satisfying results. Take your time with each stage of the painting process, from priming and base coating to detailing and finishing.
- If you’re working on a complex piece or trying a new technique, give yourself the time to learn and improve. Patience will enhance your skills and lead to more enjoyable and rewarding painting experiences.
- Invest in Quality Tools and Paints. Quality tools and paints can significantly improve your painting results. Invest in good brushes that hold their shape and provide control.
- Opt for high-quality paints with good pigmentation and coverage. While you don’t need to break the bank, choosing quality materials can improve your painting experience and outcomes.
- Proper tool maintenance, like cleaning brushes thoroughly and storing paints correctly, will extend their lifespan and ensure consistent performance.
Improving your miniature painting skills is a journey of challenges and rewards.
By practicing regularly, experimenting with techniques, and learning from others, you’ll continue to grow and enhance your craft. Embrace the learning process, stay patient, and enjoy the satisfaction of creating beautifully painted miniatures.
Conclusion
Congratulations! You’ve just tapped into a goldmine of miniature painting techniques and insights. Whether you’re just starting out or looking to take your skills to the next level, you’ve now got a whole arsenal of tips and tricks at your disposal.
As you master the basics and explore advanced methods such as NMM and OSL, remember that improvement comes with practice. When I first started, it took me a while to get the hang of these techniques, but with time and dedication, I saw my work transform before my eyes.
Whether you’re painting for wargaming or creating stunning standalone pieces, the world of miniature painting is a canvas waiting for your imagination.
Don’t hesitate to experiment and push your boundaries – that’s where the real magic happens. So, what’s stopping you? It’s time to dive in and make your mark in the miniature world, one brushstroke at a time! And if you’re hungry for more insights, be sure to explore the wealth of articles and resources out there – there’s always something new to discover.









Leave a Reply